
Island Batik Fabric choices: Winged Things Collection by Kate Colleran; Ravishing Reds (2.5 inch); Winter ’23 Green and Blue Snowflakes (5 inch); Blenders Marble Aqua; Sunny Meadow Mini Pink Sprigs; Foundations Solids in White Pink, Yellow and Green; Brilliant Blues (10-inch precuts)

Introduction
I had considered my December challenge response for a few months. I love Christmas so I determined right off that would be my project inspiration. I was so fortunate to receive and Accuquilt GO this year and loved using it! The Accuquilt GO camper die that I purchased spurred creative output and holds so many applique design composition possibilities.

In my younger years I was quite the camper, heading to Northern Michigan camping in the Cedars along Sleeping Bear Dunes, to Canada camping near the Tobermory Grotto Caves, to Florida camping in the Keys and to the American West; pegging Utah as my favorite state because of its exploration diversity. I have included my camping experiences in my poetry and in my mixed media art so why not my Quilting. My August Island Batik Ambassador challenge was the first time I used the Accuquilt Go camper die. I designed a camper scene bag with mountains, moons, trees, clouds, and a tent– the bag was double sided transposing the color scheme.
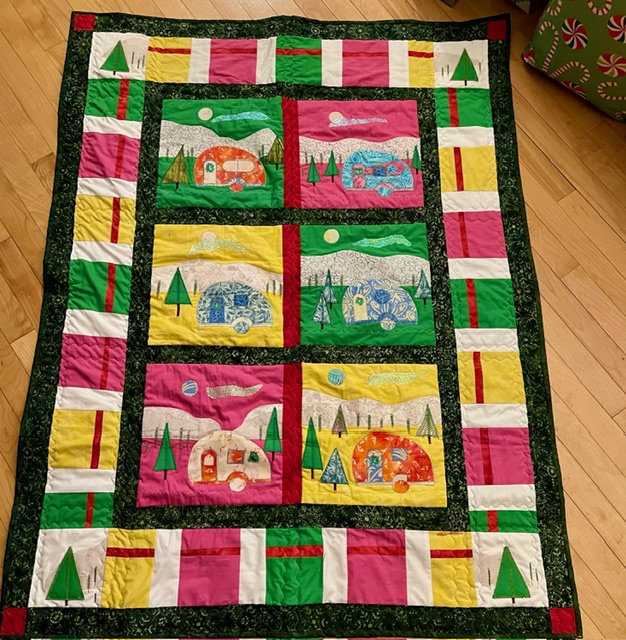
I had so many positive comments to my August project I just had to continue with the camper die for my Holiday challenge! The Island Batik fabric collections are perfect for the camper die–the color combinations are endless! For my holiday project though I wanted to give a nod to mid-century color themes and place the camper in a snowy theme so the design, Christmas Camping at Snowy Mountain was born.
Scissors
Before starting fabric cutting, I changed the blade on my 45mm Fiskars Titanium Stick rotary cutter. I had used the replaced blade for many months and knew it was time. There is nothing like a new blade in the rotary!
An essential tool for any of my applique projects is my Karen Kay Buckley 4″ Perfect Scissors-green. These scissors have a serrated edge, this special blade pulls the fabric into the scissors rather than pushing it away like traditional scissors. The blades are sharp to the very tip and the serrated blade keeps fabric from fraying. The 4″ size is great for detail cutting on applique curves and points.
The Asdirne Titanium Coating Sewing Scissors in the 10.5-inch length, has 3mm thick blades, and 4.6-inch blade length are perfect for trimming seams when needed. I keep them on my cutting table all the time. The longer cutting length saves both time and hand strength.
Needles & Thread


As I started, I first cleaned my bobbin casing and switched out my Schmetz 100/16 Chrome Needle–so important!! I used a thicker fusible Pellon interfacing for the mountains and trees plus I backed the blocks with batting while appliqueing. Once the applique was complete ; and before I started piecing the blocks together, I switched to a 75/11 Schmetz Quilting needle.
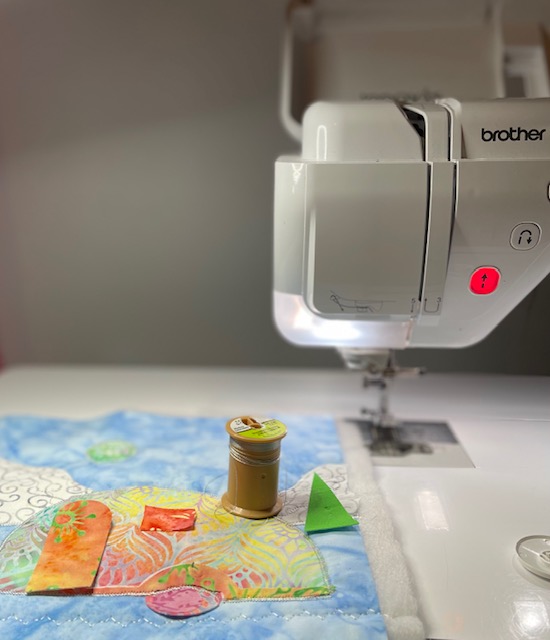
I used a variety of threads, the holidays are when I break out my collection of metallics. There was a lovely Mettler blue metallic used for the clouds, moon and extra sparkle around the perimeter of the camper. There was a Guttermann pine green cotton used for the trees. My absolute favorite thread for this project was the Aurifil green, its performance was outstanding.
Because of the amount of thread used in the project’s applique finishing, I had four spool chicken incidents where the spool ran out of thread or was about to.
- Of course, the 3/4 spun on previous projects, the Aurifil white cotton I use for the bobbin thread ran out after about 8 bobbins in
- A lovely silver Coats & Clark used for the perimeter of the camper had only 10 inches left after 16 campers were complete
- The gorgeous Aurifil 80/12 weight green small spool used for the trees had about 12 inches left.
- An Aurifil small spool brown used for the tree trunks started at about 3/4 spun and had about16 inches left.
Applique Prep & Auditioning Applique Composition
The Schmetz 100/16 needle assists with the heavier weight of the Pellon applique facing I used for the trees and the snowy mountains. Additionally, I add a layer of Hobbs Cotton Batting prior to appliquéing for a quilt as I go opportunity. The camper fabric pieces were cut on the Accuquilt GO after fusing a lighter weight Pellon to 5-inch swatches of selected fabric; of course, double sided! Once all the fabrics I was going to use were prepped with fusibles, and the campers cut I was able to audition the composition with all the design elements.


The Accuquilt GO! camper die set consists of seven elements:
- Camper
- Camper side accent/bumper
- Camper door
- Camper door window
- Camper side window
- Tire
- Hubcap
The finished size of the camper is 6 1/4″W x 4 5/8″H. I chose to use 12-inch background squares for six of the campers blocks in Island Batik Foundation Solids bright colors and 10-inch background squares in alternating light and dark blues from the Island Batik Brilliant Blues collection.
I did take some design license and designed alternative options with the camper windows because of my desire to have each camper unique. I also utilized the Accuquilt GO Camper tire cutouts and a few hubcaps as the moon or sun.
The Accuquilt GO Camper die does come with a FREE GO! Camper Embroidery Designs ($22 value) download available. Each shape includes motif, blanket and satin stitches. Once my Bernina is back from the annual check-up, I will use that option. My daughter already has ideas for her home. She has a room with her own camp and cabin travel mementos.

Quilt Construction
Once the design composition was auditioned and selected for each of the 16 blocks, I fused the mountains first then the campers. Using satin stitches, I finished the edges of the snowy mountain and camper appliques. The trees came next, and I added texture with the wonderful diversity of stitches available on my Brother Dreamweaver. I included applique and embroidery pine trees using two colors of green, a pine and the lighter Aurifil thread shown above.
While working on the applique finishing of the mountains, campers and trees, I considered how to add some Christmas color and how to fill the sky space. I auditioned different stitches to create an emboidered wreath and clouds using mylar to add some sparkle. Starting with the clouds, I used a beautiful light blue Mettler metallic thread and the meandering stitch to sew down the mylar cloud. Working with mylar is fun and you cannot beat the sparkle.


I used a green mylar for the wreathes, cutting the mylar in a circle and using that wonderful Auirfil NE12 green then adding a red embroidered bow. Remember I audition any design idea on a scrap fabric swatch before attempting on the actual block.
Once all the blocks were complete, the batting edges were trimmed and for the lap quilt a 2.5-inch sashing of Island Batik Winter ’23 Green Snowflakes and Ravishing red were added. I needed about 12 inches for a lap quilt size quilt so I created a 6-inch wide Christmas presents block border with the Island Batik Foundation Solids in pink, green and yellow that I had used for the background squares. For corner stone blocks of the 6-inch border, I created a Snowy Mountain and pine tree 6-inch square block. A 2.5-inch final border of the Island Batik Winter ’23 Green Snowflakes with 2.5-inch square Island Batik Ravishing Red cornerstone blocks. The final size was a perfect 45-inch by 60-inch lap quilt. Quilting was simple stitches, not wanting to distract from the applique.
There are two more lap quilts constructed from the 10-inch Island Batik Brilliant Blues blocks. Island Batik’s Winter ’23 Blue Snowflakes was used for sashing. Perfect match with the Brilliant Blues and the holiday theme. These are awaiting quilting and I will post when complete:)
Lap Quilt Batting

I selected the 60 by 60 Hobbs Tuscany Cotton/Wool Blend Batting. Each product in Hobbs’ Tuscany Batting line is lovingly cut, folded and packaged by hand, providing quilters with a batting that has few if any wrinkles or creases, and wonderful loft in those products designed to provide high loft. I so appreciated the smooth unfolding of this product. I had spent the day baking Christmas cookies with my grandkids. After a little break, my daughter and I cleared the table and layered the quilt backing, batting, and pieced top for pinning/basting. Hobbs Tuscany came out of the package so smoothly that our work went quickly!
Brenda Alburl ~ Songbird Designs
Pamela Boatright ~ Pamelaquilts
Susan Deshensky ~ Lady Blue Quilt Studio
Brittany Fisher ~ Bobbin with Brittany
Preeti Harris ~ Sew Preeti Quilts
Mania Hatziioannidi ~ Mania for quilts
Reed Johnson ~ Blue Bear Quilts
Victoria Johnson ~ Forever Quilting For You
Randi Jones ~ Randi’s Roost
Connie Kauffman ~ Kauffman Designs
Emily Leachman ~ The Darling Dogwood
Denise Looney ~ Quiltery – For the Love of Geese
Leah Malasky ~ Quilted Delights
Maryellen McAuliffe ~ Mary Mack Made Mine
Anorina Morris ~ sameliasmum.com
Lisa Pickering ~ Lisa’s Quilting Passion
Sarah Pitcher ~ Pitcher’s Boutique LLC
Claudia Porter ~ Create with Claudia
Lana Russel ~ LanaQuilts.com
Elita Sharpe ~ Busy Needle Quilting LLC
Gail Sheppard ~ Quilting Gail
Sandra Starley ~ Textile Time Travels
Jennifer Thomas ~ Curlicue Creations
Suzy Webster ~ WebsterQuilt

Leave a reply to pamelaquilts Cancel reply